

Consistent wood veneer quality depends on more than the slicing machine. Log condition, storage, cutting preparation, heating, knife setup, drying, grading, and post-production handling all influence the appearance and performance of the finished veneer.
For manufacturers and buyers, effective quality control means identifying risks at each production stage and linking every defect to a likely cause and corrective action. The exact processing settings must be validated for the wood species, log diameter, veneer thickness, equipment, adhesive system, and intended application.
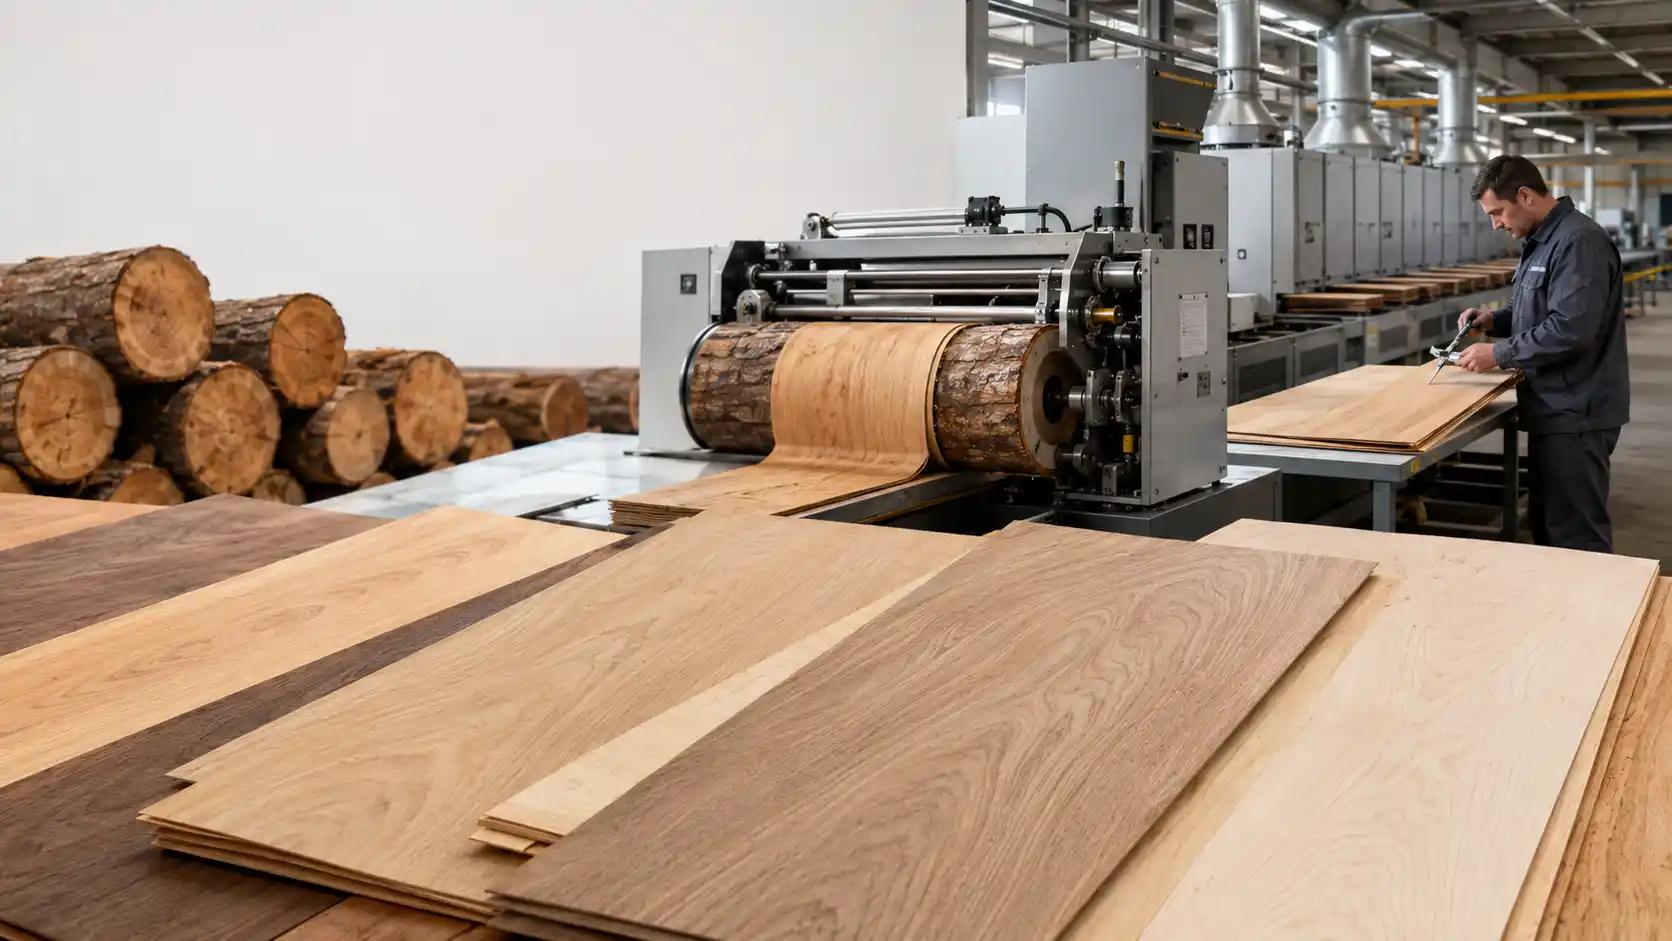
Why Wood Veneer Quality Control Must Start with the Raw Material
Wood is a variable natural material. Two logs of the same species may differ in moisture condition, grain direction, density, color, growth stresses, and defect distribution. These differences affect cutting resistance, veneer yield, surface smoothness, color consistency, and drying behavior.
Before production begins, the factory should define acceptance criteria for incoming logs and establish a traceable inspection process. Buyers who need additional background on decorative materials can review the main types of veneer and veneer boards used in interior products.
1. Select and Inspect Logs Carefully
High-quality veneer begins with logs suitable for slicing or rotary peeling. Incoming inspection should identify defects that could reduce usable yield or appear in the finished sheets.
Important log conditions to inspect
- Decay and biological damage: Soft, discolored, or structurally weakened areas may produce unstable or unusable veneer.
- Severe sweep or irregular form: Crooked logs can reduce recovery and make grain control more difficult.
- Knots, splits, checks, and cavities: Their size, position, and frequency affect appearance grade and sheet integrity.
- Insect damage: Galleries and holes may continue through multiple veneer sheets.
- Stain and color variation: Surface or internal discoloration may limit matching options for decorative applications.
- Reaction wood and difficult grain: These conditions can increase distortion, tearing, and thickness variation.
Logs should be graded, marked, and assigned to the most suitable cutting pattern. Defect mapping before breakdown helps operators position the log or flitch to improve yield and obtain the desired grain figure.
2. Store Logs Without Allowing Excessive Drying or Deterioration
Log storage must slow moisture loss and biological deterioration without creating new staining or decay risks. There is no universal rule that all logs must be watered continuously. The appropriate method depends on species, climate, storage duration, yard design, and local operating conditions.
Depending on the validated storage procedure, controls may include shade, end protection, scheduled sprinkling, water storage, drainage management, and first-in-first-out inventory rotation. The storage period should be kept as short as practical, and operators should monitor logs for end checks, fungal growth, odor, softening, and color change.
Because moisture condition affects dimensional stability and machining behavior, production teams should understand wood moisture content and its relationship with the surrounding environment. When appearance is critical, the causes of wood discoloration should also be considered during yard storage and pre-production handling.
3. Control Log Sawing and Flitch Preparation
Sawing determines how the natural grain will appear in the veneer and how much usable material can be recovered. Poor breakdown decisions can expose defects, create unstable flitches, or waste valuable figure.
Key controls during preparation
- Choose a cutting orientation that matches the required grain pattern.
- Remove or isolate severe defects before they reach the slicing process.
- Prepare stable reference surfaces so the flitch is supported correctly.
- Keep cutting dimensions consistent to improve machine setup and recovery.
- Record species, log source, batch, and preparation details for traceability.
The objective is not simply to maximize the number of sheets. It is to balance recovery with visual grade, sheet width, grain consistency, and downstream usability.
4. Heat or Steam Logs According to Species and Condition
Heating or steaming can soften wood before peeling or slicing, reducing cutting resistance and helping the knife produce a smoother sheet. However, the treatment must be controlled. Insufficient heating may leave the wood difficult to cut, while excessive or uneven treatment may contribute to color change, over-softening, or inconsistent cutting behavior.
The heating schedule should be based on species, log or flitch size, initial temperature, moisture condition, and the required veneer appearance. Heating, holding, and cooling stages should follow a documented process rather than a single setting applied to every batch.
The U.S. Forest Products Laboratory provides technical background on the relationship between log heating, veneer quality, and material properties. Its publication on peeling, slicing, and drying veneer also describes defects and process-control considerations.
5. Maintain Stable Slicing or Peeling Conditions
Even well-selected and properly conditioned wood can produce poor veneer when the cutting system is unstable. Operators should inspect both the sheets and the machine throughout production instead of waiting until the batch is complete.

Machine and process factors that affect veneer quality
- Knife sharpness and edge condition: A dull, damaged, or contaminated edge can cause tearing, fuzzy grain, scoring, or knife marks.
- Knife geometry: Knife angle and setup must suit the species, cutting method, and material condition.
- Pressure-bar setting: Incorrect pressure or clearance can increase lathe checks, crushing, roughness, or thickness variation.
- Feed stability: Irregular feed may create alternating thickness or surface defects.
- Machine vibration and wear: Loose or worn components can leave repeating marks and reduce thickness accuracy.
- Flitch support and cleanliness: Movement, debris, or poor contact can damage the sheet surface.
In-process checks should include thickness, width, surface quality, splits, checks, knife marks, grain tearing, color, and repeat defects. When a defect appears in a regular pattern, the machine condition should be investigated immediately.
6. Dry Veneer Evenly and Verify Moisture Content
Drying is one of the most sensitive stages in veneer production. The factory must remove enough moisture for stable handling and downstream bonding without making the sheets brittle, curled, checked, or excessively dry.
Dryer temperature, airflow, residence time, feed speed, sheet thickness, species, initial moisture content, and load uniformity interact with one another. Operators should therefore adjust the drying process using measured results rather than relying only on a fixed machine speed or temperature.
Risks of poor drying control
- Underdrying: May increase the risk of mold, moisture movement, poor storage stability, and bonding inconsistency.
- Overdrying: May make veneer brittle and more vulnerable to cracking, splitting, curl, or handling damage.
- Uneven drying: Can produce moisture gradients, waviness, variable dimensions, and inconsistent adhesive performance.
- Excessive drying rate: May increase surface or internal checks, especially in difficult species or thicker sheets.
Moisture should be checked at defined intervals and at representative positions within the batch. A single reading from one sheet is not enough to demonstrate uniformity. The target range must be specified according to the product, adhesive, customer requirement, end use, and expected service environment.
For authoritative guidance on moisture measurement, recommended moisture conditions, drying methods, and dimensional change, consult the U.S. Forest Service Wood Handbook, particularly its chapter on drying and moisture control.
7. Grade, Condition, Store, and Pack Finished Veneer Correctly
Quality control continues after the dryer. Veneer sheets should be allowed to stabilize under controlled conditions before final grading and packing. Inspection should take place under consistent lighting so that color, surface defects, and grain differences can be evaluated reliably.
Final inspection items
- Thickness and dimensional tolerance
- Moisture content and moisture uniformity
- Knife marks, roughness, torn grain, and surface contamination
- Splits, checks, holes, knots, stain, and decay
- Color consistency and sequence matching
- Curl, waviness, buckling, and handling damage
- Grade, bundle identification, batch traceability, and quantity
A documented wood veneer grading system helps production teams and customers use the same quality language. After grading, sheets should be protected from direct sunlight, moisture exchange, dirt, bending, and edge damage. Flat support, suitable wrapping, clear lot identification, and controlled warehouse conditions reduce the risk of deterioration during storage and transport. Additional guidance is available in this overview of moisture and mildew prevention for wood veneer.
Wood Veneer Quality Control by Production Stage
| Production Stage | Main Risk | Possible Quality Result | Primary Control |
|---|---|---|---|
| Log selection | Decay, knots, checks, stain, irregular form | Low yield, holes, splits, color defects | Incoming grading, defect marking, batch segregation |
| Log storage | Moisture loss, fungi, insects, prolonged storage | End checks, discoloration, decay | Validated moisture protection, drainage, monitoring, inventory rotation |
| Sawing and flitch preparation | Poor orientation or unstable preparation | Unwanted grain, waste, unstable cutting | Cut-pattern planning, defect removal, stable reference surfaces |
| Heating or steaming | Insufficient, excessive, or uneven treatment | Rough cutting, color variation, over-softening | Species- and size-specific heating schedule |
| Slicing or peeling | Dull knife, poor geometry, vibration, unstable feed | Knife marks, checks, roughness, thickness variation | Machine setup verification and continuous sheet inspection |
| Drying | Incorrect temperature, airflow, speed, or endpoint | Curl, brittleness, mold risk, uneven moisture | Measured moisture checks and controlled dryer settings |
| Grading and packing | Inconsistent inspection or poor protection | Mixed grades, damage, moisture regain, customer disputes | Defined grading criteria, traceability, flat protected storage |
Common Wood Veneer Defects and Their Likely Causes
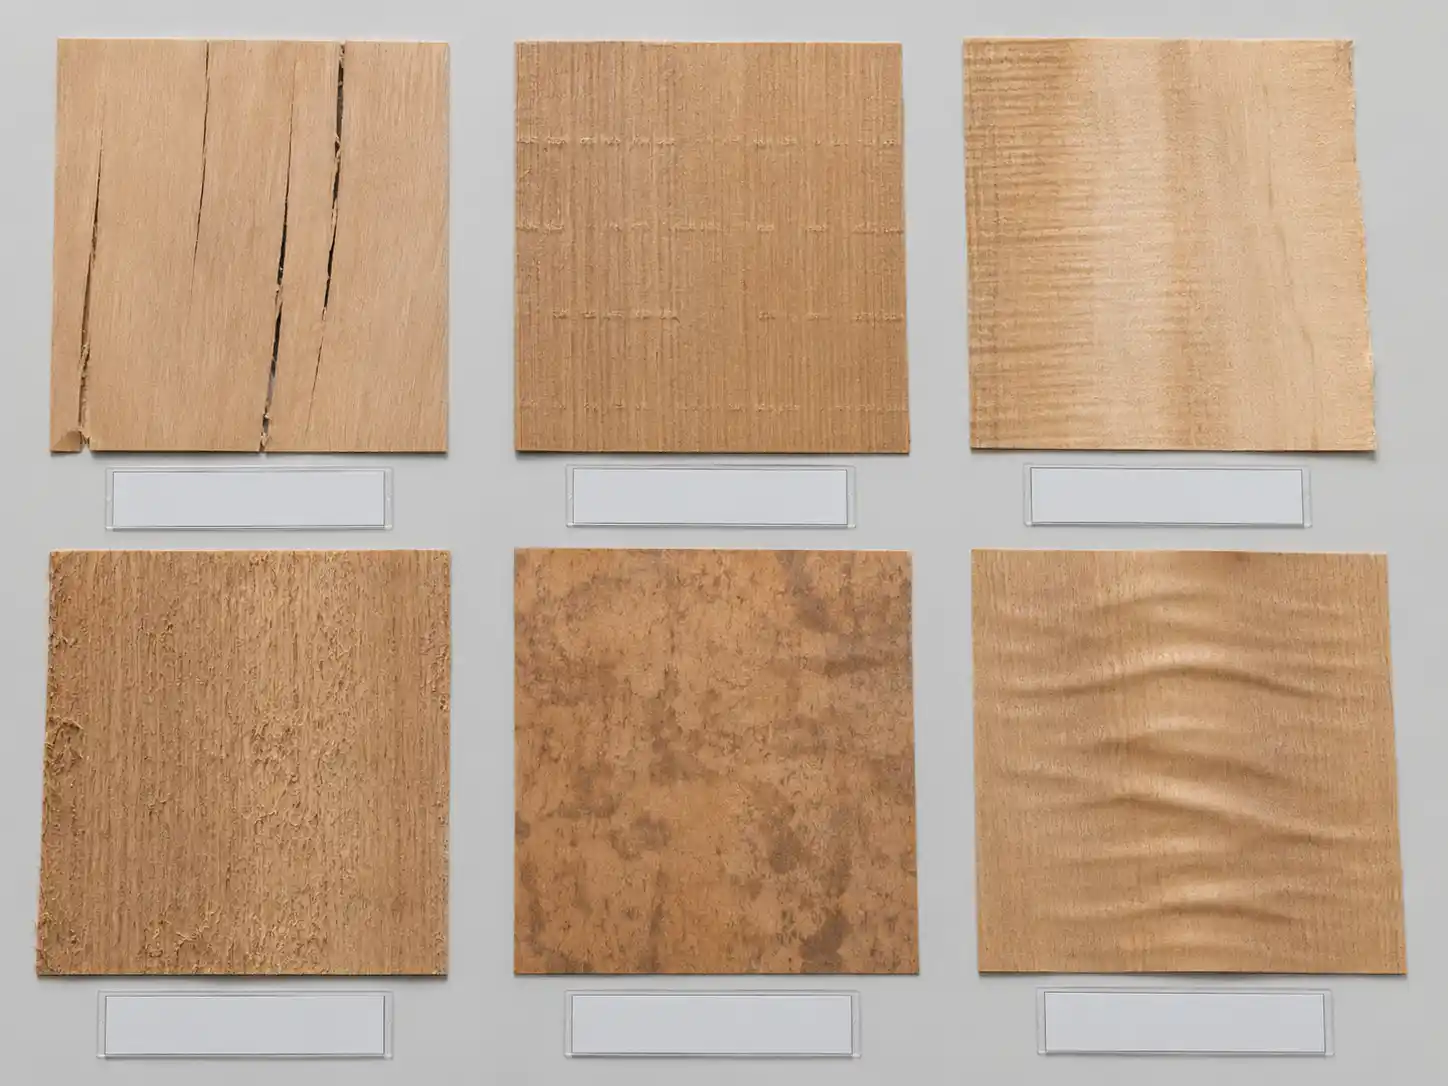
Cracks, splits, and checks
Possible causes include log drying, existing checks, insufficient conditioning, unsuitable knife or pressure-bar settings, difficult grain, excessive cutting stress, and overly aggressive drying. The defect pattern and location should be examined before changing the process.
Knife marks or repeating lines
These often point to a damaged knife edge, embedded debris, vibration, feed instability, or worn machine components. Repeating intervals can help maintenance personnel locate the mechanical source.
Thickness variation
Variation may result from unstable feed, incorrect setup, worn drive components, movement of the flitch or log, or inconsistent pressure-bar action. Thickness should be checked across the sheet and throughout the production run.
Rough, fuzzy, or torn grain
Likely factors include knife condition, unfavorable grain direction, inadequate softening, unsuitable cutting geometry, or species-specific anatomy. A sharp knife alone may not solve the problem if heating or support conditions are incorrect.
Discoloration or mottling
Color defects can develop during log storage, biological attack, oxidation, mineral reaction, uneven heating, excessive treatment, or post-drying exposure. Batch records are essential for tracing when the change occurred.
Curl, waviness, or buckling
These defects are commonly associated with uneven moisture removal, moisture gradients, variable sheet thickness, grain orientation, or poor handling after drying. Conditioning and flat storage may reduce additional distortion, but the drying cause must still be corrected.
A Practical Factory Inspection Workflow
- Approve the raw material: Record species, source, dimensions, visible defects, storage condition, and batch number.
- Confirm preparation: Verify the cutting pattern, flitch dimensions, defect removal, and heating schedule.
- Approve the first sheets: Check thickness, surface, grain, color, and defects before continuous production.
- Inspect during the run: Sample at defined intervals and stop to correct repeating or worsening defects.
- Verify drying: Measure representative sheets and confirm both the target moisture range and batch uniformity.
- Grade and release: Inspect appearance and dimensions, identify the lot, protect the sheets, and retain quality records.
A supplier should be able to explain how these controls fit into its broader production process, including inspection responsibilities, equipment maintenance, traceability, and handling procedures.
Frequently Asked Questions
What moisture content is recommended for wood veneer?
There is no single target that is correct for every veneer. The specification should reflect the wood species, veneer thickness, adhesive or backing system, downstream manufacturing process, customer requirement, and expected service environment. The factory should define an acceptable range and verify uniformity across each production lot.
Why does veneer crack during slicing?
Cracking can be related to pre-existing log checks, moisture loss, insufficient heating, difficult grain, a dull knife, unsuitable knife geometry, incorrect pressure-bar settings, unstable support, or excessive cutting stress. Operators should evaluate the defect pattern before adjusting one variable.
How does heating affect veneer color?
Heat can change extractives and other wood components, so treatment conditions may alter color. Uneven temperature, excessive duration, or inconsistent raw-material condition can create variation within or between batches. Color-sensitive products require controlled schedules and reference samples.
What causes knife marks on veneer?
Common causes include a nicked or contaminated cutting edge, machine vibration, debris, unstable feed, poor knife alignment, and worn mechanical components. Regular, repeating marks usually indicate a machine or blade issue rather than a random wood defect.
How can a factory improve veneer yield without lowering quality?
Yield improvement begins with log grading, defect mapping, suitable cutting orientation, stable flitch preparation, correct conditioning, maintained equipment, and rapid correction of in-process defects. The goal should be usable, correctly graded veneer rather than the highest possible sheet count.
Conclusion
Wood veneer quality is created through a connected process. Strong raw-material selection cannot compensate for poor heating, and accurate slicing cannot compensate for uncontrolled drying or careless storage. The most reliable factories define standards for every stage, measure the results, record batch conditions, and correct defects as soon as they appear.
By controlling log quality, storage, sawing, conditioning, slicing, drying, grading, and packing as one system, manufacturers can improve consistency, reduce waste, protect decorative appearance, and give customers clearer evidence of product quality.