

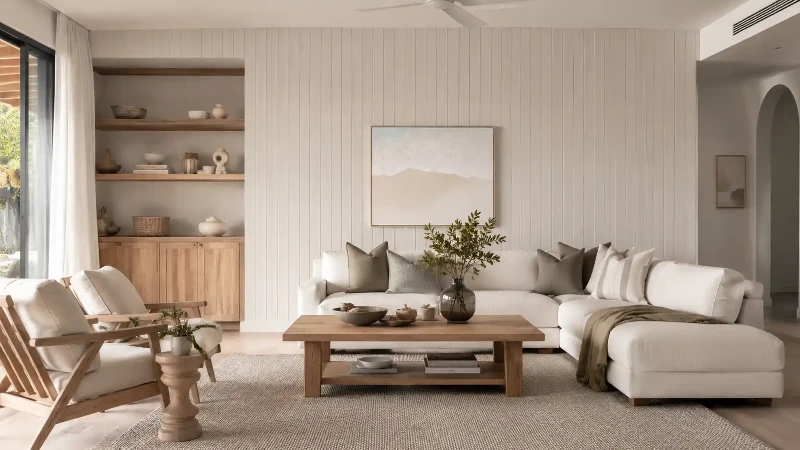
VJ panelling can turn a flat wall into a more architectural surface without relying on heavy ornament. The repeated V-shaped grooves work in traditional Australian interiors, contemporary feature walls, half-height treatments and ceilings. The visual idea is simple; choosing the right product is not.
The important distinction is that VJ describes a profile, not one universal material. Two panels can look almost identical but use different substrates, thicknesses, joining systems and moisture ratings. Before buying, decide where the panelling will go, what exposure it must handle and how it needs to meet the surrounding trim. If you are comparing broader decorative options first, the wood wall panel range is a useful starting point.
This guide focuses on the decisions that affect the finished result: material, wet-area suitability, panel dimensions, groove spacing, installed cost and fixing method.
What Is VJ Panelling?
VJ panelling is a wall or ceiling lining with repeated V-shaped joints or grooves. In traditional timber construction, the V is commonly formed at the meeting edges of tongue-and-groove boards. Modern products can reproduce the same linear appearance in larger engineered sheets or panel systems.
The terminology has a genuine Australian history. The State Library of Queensland notes that many Queensland houses used tongue-and-groove timber wall and ceiling linings, with beaded boards appearing earlier and V-jointed, or VJ, boards later. That history helps explain why VJ is so strongly associated with Queenslander and other traditional Australian interiors.
VJ Means V-Jointed or V-Grooved, Not Simply "Vertical Joint"
The grooves are often installed vertically, but orientation is separate from profile. A VJ panel may be installed vertically or, where the product system allows it, horizontally. Rotating the panel does not turn it into shiplap; shiplap uses a different overlapping or rebated joint.
Sheet Panels vs Individual Boards
Traditional VJ linings are commonly made from individual profiled boards. Modern systems may use larger sheets with multiple grooves machined into the face. Sheet systems can reduce the number of pieces that need to be installed, while individual timber boards give you the natural grain and board-by-board character of solid wood.
Neither format is automatically better. The right choice depends on the wall size, desired finish, substrate, joining system, moisture exposure and installation method.
Start With the Application, Not the Appearance
A reliable selection order is:
- Application: dry interior, humid room, wet area, ceiling or semi-exterior location.
- Substrate: MDF, moisture-resistant engineered board, solid timber, WPC/composite or another rated material.
- System: sheet or board format, thickness, joining method, fixing method and required expansion allowances.
- Appearance: groove spacing, direction, colour, finish and full-height versus half-height layout.
This order prevents a common mistake: choosing a profile that looks right in a sample, then discovering that the underlying product is wrong for the room.
VJ Panel Materials Compared
| Material | Main strengths | Key checks before buying | Typical use |
|---|---|---|---|
| MDF | Smooth, consistent and easy to paint | Interior rating, thickness, edge treatment, fixing method | Bedrooms, living rooms, hallways and other dry interiors |
| Wet-area-rated engineered MDF | Designed for higher-moisture interior applications when specifically rated | Exact wet-area approval, excluded zones, waterproofing requirements, cut-edge treatment | Suitable bathroom, laundry and kitchen locations |
| Solid timber | Natural grain, authentic board character and repairable finish | Species, movement, acclimatisation, coating and fixing | Feature walls, ceilings and premium interiors |
| WPC or composite | Engineered performance and low-maintenance options | Water, UV and fire ratings; installation system | Product-specific interior or other rated applications |
| Exterior or semi-exterior panel | Designed for more demanding exposure | Exact exposure category, UV resistance, drainage, coating and fixings | Covered outdoor or semi-exterior locations where specifically approved |
MDF VJ Panels for Dry Interiors
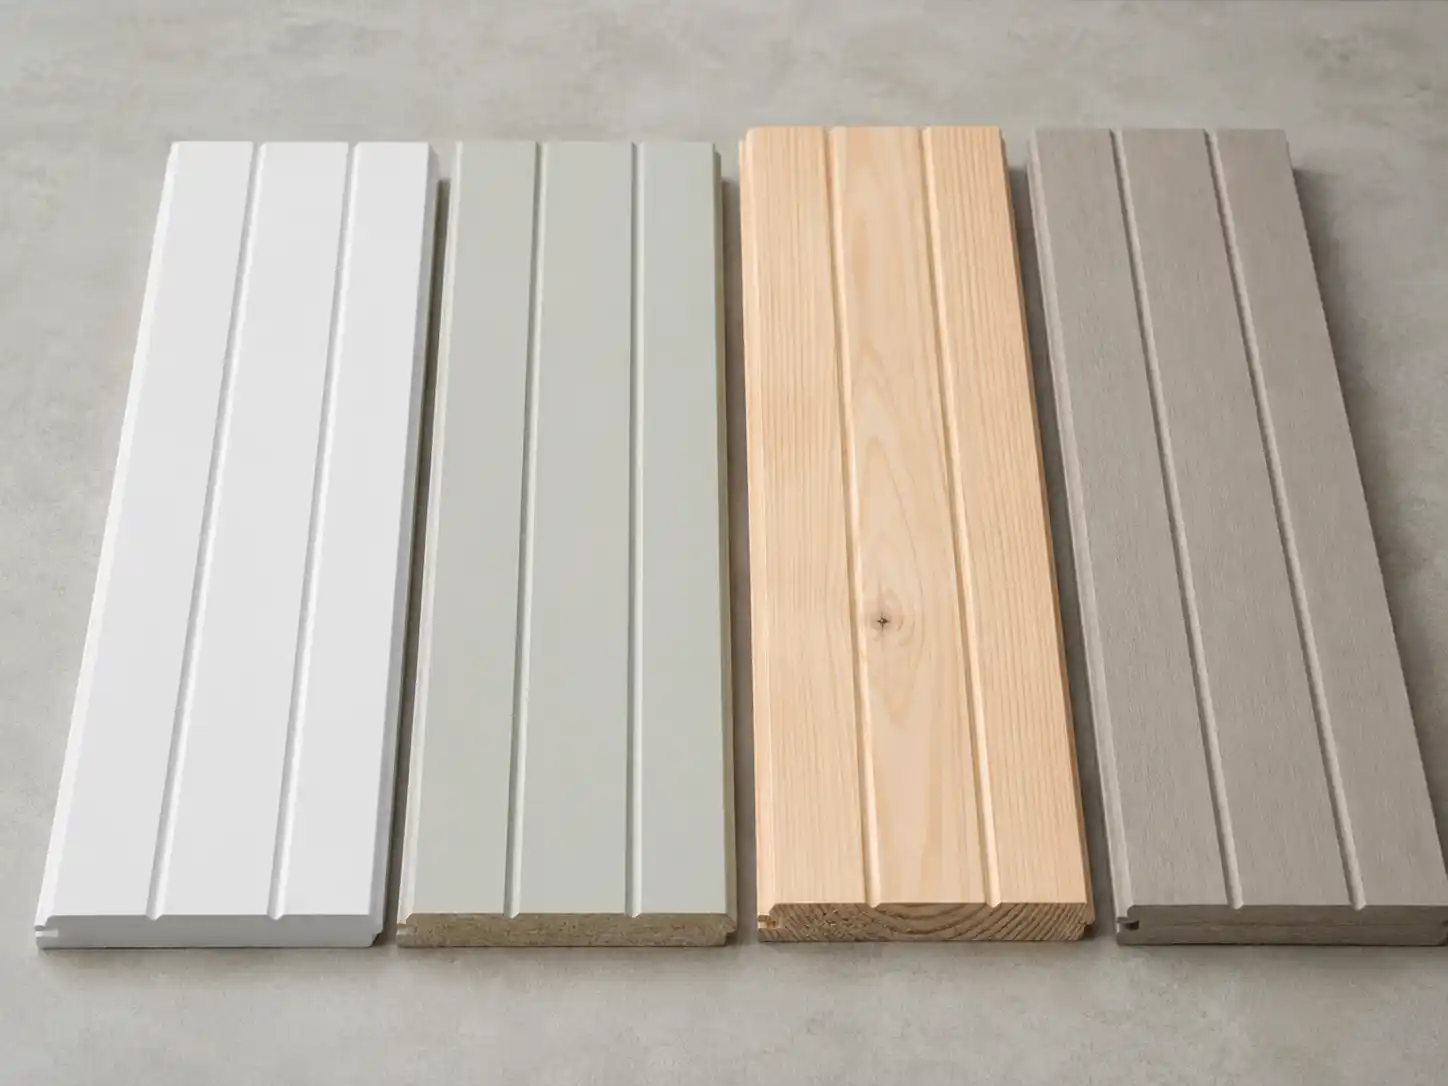
MDF is widely used for paint-finished wall panelling because it has a smooth surface and consistent density. The WoodSolutions MDF guide describes standard MDF as primarily an interior-use product and notes its limited moisture resistance. That makes ordinary MDF a sensible choice for suitable dry rooms, but not something to move into a bathroom simply because the face has been painted.
When comparing paint-grade products, look beyond the face pattern. Check the sheet thickness, edge profile, joining method and whether cut edges need sealing. You can also compare the site's MDF wall panel options when evaluating engineered interior panels.
Wet-Area VJ Panels
"Moisture resistant" and "waterproof" are not interchangeable. A panel may be designed for humid interior conditions without being approved for direct and repeated water exposure. A bathroom wall outside a shower, the wall behind a basin and the inside of a shower enclosure are different exposure conditions.
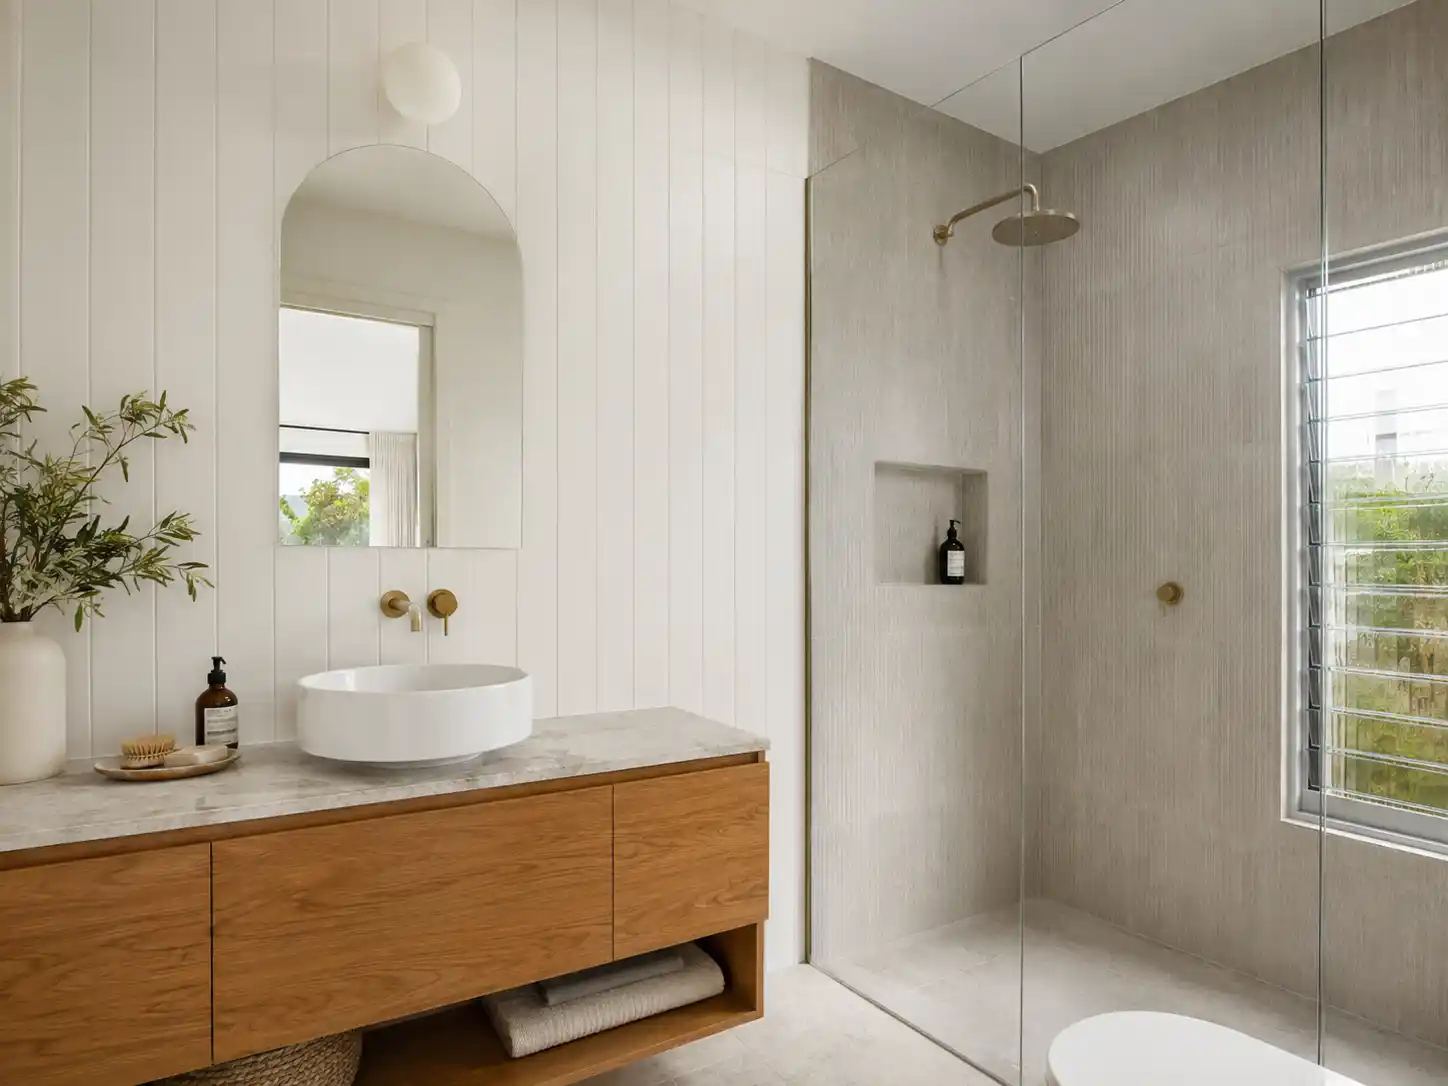
Australian wet-area requirements make this distinction important. The National Construction Code guidance on waterproofing in houses separates areas that must be water resistant from those that must be waterproof. For example, shower walls are subject to waterproofing requirements, not merely a general moisture-resistance claim.
Before using any VJ product in a bathroom or laundry, read the product data sheet and confirm:
- whether the product is approved for the specific room and wall location;
- whether it is excluded from shower enclosures or other direct-water zones;
- whether a separate waterproofing system is required behind it;
- how joins, penetrations and cut edges must be treated;
- which adhesives, fasteners, sealants and coatings are permitted; and
- whether local building requirements impose additional conditions.
For more room-specific planning, see the site's guide to bathroom wood wall panelling.
Solid Timber VJ Panelling
Solid timber is the better choice when the material itself is part of the design rather than simply a substrate for paint. Grain, knots, colour variation and natural movement become visible parts of the wall.
WoodSolutions' interior timber panelling guidance gives general solid-timber lining thicknesses of about 9–19 mm and cover widths from about 65 mm to more than 140 mm. Those figures are useful as a reference for traditional board systems, but they are not universal VJ dimensions. The actual profile, cover width and movement allowance must come from the selected product.
Timber also makes movement more important. The species, board width, moisture conditions, coating system and fixing method all affect how the lining behaves after installation.
WPC and Composite VJ-Style Panels
Composite materials can be engineered for properties that differ from standard MDF or solid timber, but "WPC" alone is not a performance rating. If you are considering a composite solution, compare its technical data rather than assuming it is automatically waterproof, UV-stable or suitable outdoors. The site's wood-plastic wall panel page provides another internal reference point for this material category.
VJ Panel Sizes, Thickness and Groove Spacing
These three dimensions are easy to mix together, yet they affect different parts of the project.
Panel Size and Effective Coverage
The overall sheet or board size tells you how much material you are handling. The effective cover width tells you how much wall each piece actually covers after tongue-and-groove or other joining details overlap. For estimating quantities, effective coverage is the more useful number.
Before ordering, record the wall width and height, subtract openings where appropriate, add a sensible cutting and waste allowance and then calculate using the manufacturer's effective cover dimension. Large sheets may reduce the number of joins, but they can be harder to manoeuvre in narrow halls, stairwells and occupied rooms.
Panel Thickness
Thickness affects more than strength. It changes how the new lining meets:
- skirting boards;
- door and window architraves;
- cornices and ceiling junctions;
- power points and switches;
- cabinetry and benchtops; and
- internal and external corners.
A panel that projects beyond existing trim can make an otherwise neat wall look retrofitted. Resolve these junctions on paper before ordering material.
Groove Spacing
Groove spacing controls visual rhythm. Narrow spacing creates more lines and a busier surface; wider spacing produces a quieter, more architectural field. There is no single "best" VJ spacing because the right scale depends on wall width, ceiling height, furniture and whether the panelling covers one wall or the whole room.
Do not judge spacing from a hand-sized sample alone. Mark several grooves at full scale on the wall with painter's tape, or stand multiple samples side by side. A profile that looks subtle in a showroom can feel much denser when repeated across a four-metre wall.
Where VJ Panelling Works Best
VJ Panelling in Living Rooms and Bedrooms
Dry living areas give you the widest material choice. Behind a bed, VJ can replace the visual role of a large headboard; on a television wall, it adds texture without introducing another pattern. If the room already has strong furniture, artwork or joinery, a wider groove spacing and restrained paint colour usually keep the wall from becoming the loudest element.
VJ Panelling in Hallways and Entries
Long walls suit repeated linear detailing well. Half-height VJ with a top rail can introduce texture while leaving the upper wall available for artwork. High-traffic areas also make paint durability and impact resistance more important than they are behind a bed.
VJ Panelling in Kitchens
Kitchen islands, dining zones and selected feature walls can work well with VJ. Areas close to sinks, cooktops and frequent cleaning need more careful material selection. Decorative wall panelling should not be assumed to replace a compliant splashback or other required protective finish.
VJ Panelling in Bathrooms and Laundries
Use only a product specifically approved for the intended wet-area location. The words "bathroom suitable" are not enough on their own; check whether that approval applies to walls outside the shower, ceilings, splash zones or direct-water areas. The NCC requirements and the manufacturer's installation instructions both matter.
VJ Panelling on Ceilings
VJ can create strong directional lines overhead, especially in verandah-inspired or traditional interiors. Ceiling installations need a product rated for that use, with appropriate fixing, support, expansion allowances and detailing around lights, vents and access panels.
Covered Outdoor and Semi-Exterior Areas
An interior wet-area panel is not automatically an exterior panel. Outdoor exposure introduces UV, temperature cycling, wind-driven moisture and different fixing demands. Use an exterior or semi-exterior system only where its data sheet explicitly allows the proposed exposure.
VJ Panelling vs Shiplap vs Beadboard
| Profile | How the line is formed | Typical visual effect |
|---|---|---|
| VJ / V-groove | A V-shaped groove or chamfer at the joint, or a machined V groove in a sheet face | Clean repeated shadow lines; traditional to contemporary |
| Shiplap | Overlapping or rebated board edges | Strong board-by-board rhythm; often coastal or rustic |
| Beadboard | Narrower repeated boards or grooves with a rounded bead detail | More decorative and traditional |
The construction difference matters when you buy and install the material. WoodSolutions distinguishes common V-jointed tongue-and-groove panelling from shiplap, which uses a lapped joint. If you are comparing traditional wall treatments more broadly, the site's wainscoting vs beadboard guide is also relevant.
How to Design VJ Panelling So It Looks Intentional
Choose the Direction for the Room, Not by Habit
Vertical grooves are the classic treatment and reinforce height. Horizontal grooves can make a wall read wider, but only use them when the panel system permits that orientation. Do not use direction as a substitute for understanding the profile.
Decide Between Full Height and Half Height Early
Full-height VJ produces a stronger architectural envelope. Half-height panelling gives you texture while leaving room for paint, wallpaper or artwork above. The half-height option often works well in hallways, dining rooms and children's rooms because it can also create a practical transition between a durable lower wall and a simpler upper finish.
Plan the First and Last Groove
Repeated lines exaggerate layout mistakes. Before fixing the first panel, check where the grooves will land beside both ends of the wall, doors, windows and cabinetry. A centred layout or a deliberately balanced end cut usually looks better than finishing with a very narrow strip on one side.
Test Paint on the Real Profile
Dark colours deepen the shadow inside the grooves; pale colours make the texture quieter. Directional daylight can change the wall dramatically during the day, so test the paint on a real panel or off-cut rather than only on a flat colour card.
How to Install VJ Wall Panels
Installation details vary by product, so the selected manufacturer's instructions always take precedence over a generic guide. The following sequence is useful for planning a typical interior project.
Step 1: Check the Product Data Sheet
Confirm the approved application, substrate, orientation, fixing method, expansion requirements, edge treatment and coating system before material is cut. In a wet area, also confirm the relationship between the decorative lining and the required waterproofing system.
Step 2: Measure the Wall and Plan the Layout
Measure width and height in more than one position because walls and ceilings are not always square. Mark doors, windows, outlets and other penetrations. Calculate where panel joins and grooves will finish at both ends.
Step 3: Prepare the Substrate
The wall must satisfy the panel manufacturer's requirements. Loose finishes, significant bows, moisture problems or an unsuitable substrate should be corrected before the decorative lining goes on. Covering a problem wall does not remove the underlying problem.
Step 4: Establish a True Starting Line
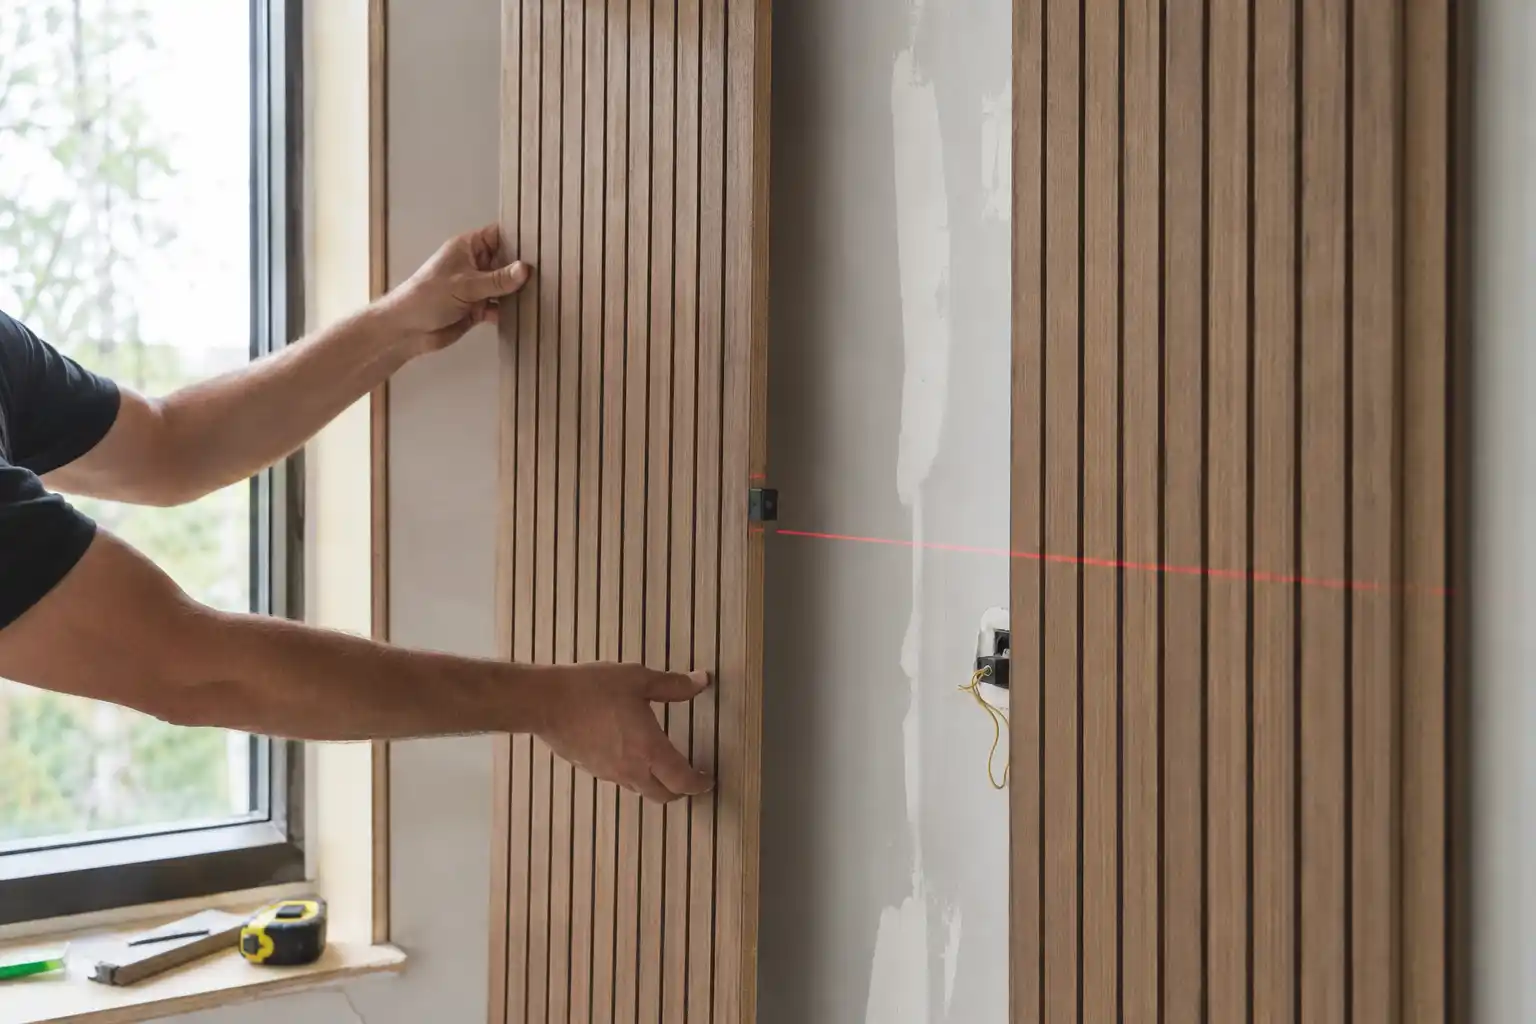
Use a level, laser or plumb line rather than assuming the nearest corner is perfectly vertical. This matters because a small error in the first panel becomes increasingly visible as the V grooves repeat across the wall.
Step 5: Cut and Dry-Fit
Make accurate cuts around openings and dry-fit difficult pieces where practical. Check the manufacturer's instructions for sealing or priming cut edges. Factory-primed faces do not necessarily mean fresh cuts can remain untreated.
Step 6: Fix the Panels With the Specified System
Use only the adhesive, nails, screws, clips or concealed fixing system approved for the panel and substrate. Do not substitute a generic adhesive because it is convenient. Correct fixing is particularly important on ceilings, in humid areas and with heavy boards.
Step 7: Finish Joins, Corners and Trim Transitions
Resolve internal corners, external corners, skirting, architraves, dado rails and top edges according to the panel system. Maintain any required movement gaps rather than filling every gap because it is visible during installation.
Step 8: Prime, Seal and Paint as Required
Prepare exposed fixings, joins and cut edges, then apply the coating system recommended for the substrate and room conditions. Higher-moisture and high-traffic areas may require a different coating specification from a bedroom feature wall.
For a broader overview of wall-panel fitting, see the site's installation guidance.
Common VJ Panelling Mistakes
Buying by Groove Pattern Alone
The face profile tells you very little about moisture rating, substrate, thickness or fixing requirements. Compare technical specifications before colour samples.
Confusing Moisture Resistance With Waterproofing
This is the highest-risk specification mistake in bathrooms and laundries. Match the product to the exact exposure zone and the applicable waterproofing requirements.
Ignoring Trim Thickness
Skirting and architrave details are often where a retrofit looks improvised. Check panel thickness against every edge condition before ordering.
Starting Installation Without Laying Out the Grooves
A narrow leftover strip or awkward groove beside a door is usually a planning problem, not a cutting problem. Dry-plan the wall first.
Using One Generic Installation Method for Every Product
Sheet MDF, solid timber boards and composites can require different adhesives, fasteners, expansion gaps and edge treatments. The data sheet should settle these questions before work begins.
Panelling Every Surface
VJ works best when it has a clear role. One feature wall, a half-height treatment or a ceiling can provide enough texture. More panelling is not automatically a better design.
Cleaning and Maintaining VJ Panels
Grooves collect more dust than a flat wall, so regular light cleaning prevents buildup. For painted interior panels, use a soft cloth or vacuum brush and a cleaning method compatible with both the paint and substrate. Avoid saturating materials that are not designed for significant water exposure.
Natural timber and specialist composite products should be maintained according to their finish and manufacturer instructions. Minor dents in paint-grade panels may be repairable with filling, sanding and repainting, but water-swollen or structurally damaged material often needs replacement rather than cosmetic repair.
Frequently Asked Questions About VJ Panelling
What Does VJ Stand for in Wall Panelling?
In this context, VJ refers to a V-jointed or V-grooved lining. The V describes the visible joint or groove profile. In Australian historical interiors, V-jointed timber boards are a well-documented wall and ceiling lining.
Is VJ Panelling the Same as Shiplap?
No. They can both create repeated linear shadow lines, but the joint construction is different. A V-jointed tongue-and-groove board forms a V at the joint; shiplap uses overlapping or rebated edges.
Can VJ Panelling Be Installed Horizontally?
Some products can. Check the selected system's installation instructions. Horizontal orientation changes the visual direction, but it does not change a VJ profile into shiplap.
Can VJ Panels Be Used in a Bathroom?
Yes, but only when the specific panel and installation system are approved for the intended bathroom location. A product suitable outside a shower may not be suitable inside the shower. Wet-area waterproofing requirements still apply.
Is VJ Panelling Waterproof?
Not by definition. VJ describes the profile, not a waterproofing classification. Performance depends on the substrate, coating, joints and complete installation system.
What VJ Panel Thickness Should I Choose?
Choose the thickness specified for the product and application, then check how that thickness meets skirting, architraves, outlets and other wall details. For solid timber internal panelling generally, WoodSolutions cites common thicknesses around 9–19 mm, but sheet VJ products can differ and should be checked individually.
What Groove Spacing Is Best?
There is no universal best spacing. Narrow spacing creates a denser pattern; wider spacing is calmer. Test the repeat at full-room scale and consider wall width, ceiling height and furniture before deciding.
How Do I Compare VJ Panelling Prices?
Compare the complete installed cost per square metre rather than panel price alone. Include coverage, waste, fixings, trims, painting, electrical adjustments and labour.
Can VJ Panels Be Installed Over an Existing Wall?
Some systems can be installed over a suitable existing surface, but only when the substrate condition and fixing method meet the panel manufacturer's requirements. Check flatness, soundness, moisture and the approved adhesive or mechanical fixing system first.
Final Takeaway
Good VJ panelling starts with a practical decision, not a decorative one. Choose the application first, the substrate second and the appearance third. Once the room exposure and product rating are correct, groove spacing, direction, colour and trim become much easier decisions.
For dry interiors, you have broad freedom to choose between paint-grade engineered panels and natural timber. For bathrooms, laundries, ceilings and exterior-adjacent areas, technical suitability matters more than visual similarity. Read the data sheet, plan every edge condition and compare the full installed system before you order.